If you want to understand and protect coral, one of the most important things to know is when they spawn. That’s the first step in setting up a breeding program. But it’s not easy.
Unable to move around to meet a mate, corals depend on time to give them the best chance of finding a partner. Most coral colonies spawn just once a year at a precise 20 minute or so period when other nearby colonies of the same species are also spawning.
How do they know what the right time is? They glean cues from the environment. They tend to spawn in the summer when water temperatures are high. They usually spawn some days following the full moon. And they also wait some number of hours after the sun sets. Each species has a particular moment they consider the most auspicious.
The thing is we don’t speak coral well enough to know when those auspicious moments are. Coral scientists have spent untold hours underwater at night watching coral colonies trying to map out the spawning calendar on their reef. And in some places they’ve built pretty decent spawning calendars.
But nothing’s perfect, especially in today’s changing seas. I once traveled to the Dominican Republic to see the coral spawn, guided by a calendar that had been years in the making by a team of talented coral scientists at Fundemar. But the staghorn corals, which were most abundant in their nursery, surprised everyone by spawning two days early. I got to see it, but just barely.
In Tela, the coral spawn hasn’t been documented. Because the elkhorn corals are so rare elsewhere and so abundant in Tela, we decided to focus on them first. If we squinted at spawning calendars from Roatan, Utila, and Mexico, it seemed like the prime time would be two to three days after the August full moon, about an hour and a half after sunset.
As long as we were going to try to catch the spawn, we also decided to try and catch the spawn, literally. The way you do that is by placing conical nets over the colonies with some sort of container on the end where the gametes will end up. Coral parents outfit their gametes with a little bit of lipid, which floats. So seeing coral spawn is like being in a reverse snowstorm. Once you have gametes, you can start to try to fertilize them, settle larvae, and grow new coral colonies.
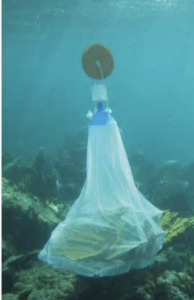
But first things first: how to build a net? I reached out to Anastazia Banaszak from UNAM in Mexico, who graciously sent me a guide with a pattern in it. The picture to the left is what we were going for. I ordered tuperware, pool floats, falcon tubes, funnels, PVC glue, rope, and silicon glue.
Our partner, Joe Henry, who had studied coral spawning in Malaysia suggested that a conical filter used for honey would work great for the top of the net. It has a metal ring that would hold the net open underwater. So I bought some of those too.
Then, off I went to the fabric store for netting. Once there, I couldn’t help but be distracted by the bling of some nets with blue sequin clamshells embroidered on it. Our nets would have bling!
Thus began a two-week sewing and gluing fest to build coral spawn nets to bring down to Honduras. I’m including a step-by-step guide, in case anyone should have an interest in building their own nets. Also, next year we’ll know where to look for directions!
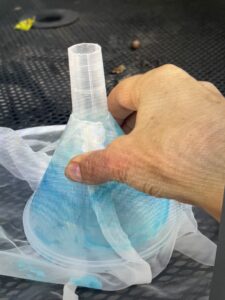
Step 1: You’ll need two plastic funnels. Cut off the end of one funnel. Cut off the pointy end of the honey filter and insert the intact filter through it. Using plenty of PVC glue, place the cut funnel over the net and make a funnel sandwich of the netting.
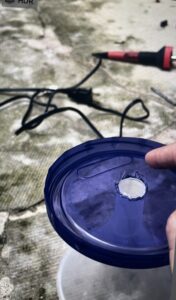
Step 2: Very carefully cut a hole the size of the narrow part of the funnel in the lid of a tupperware container. Also make two holes for rope to pass through on either side. (Not shown) I used a soldering iron, but be sure to do it outside, because: fumes. Glue the lid onto the funnel.
Step 3: Even more carefully cut a hole the size of the narrow part of the funnel in the lid of a falcon tube. Again, go outside because of the fumes. Glue the top upside down onto the funnel so the tube can be twisted onto it. (Not shown here, see finished product below.)

Step 4: Use a string anchored on the floor with tape to trace out 170 degrees of a circle with a 90 cm diameter. Because I was going to attach the top of my net to the end of the bottom of the honey filter, which was conveniently equipped with a metal ring that would hold the net open underwater, I also cut a circle with a diameter of the length of the honey filter (for me that was 18 cm) at the top. To the right is Anastazia’s pattern from the guide.
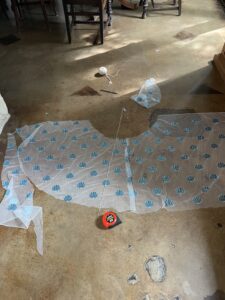 And here is my cutting floor with the blingy netting. It would have been smart for me to make a cardboard pattern, like Anastazia did, because the net is wiggly when you cut it. Lesson learned.
Step 5: 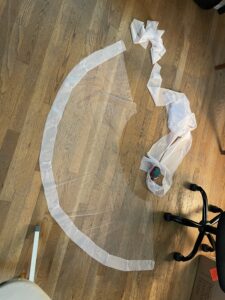 I wasn’t sure how we would attach the nets to the seafloor, but I thought that perhaps we’d thread ropes through zipties attached to the bottoms of the nets. So I decided to reinforce the bottom with an iron-on stabilizer. Then I figured out how to make buttonholes with my sewing machine (that felt like a great discovery as I’ve owned it for 20+ years and never knew it had that capability) and put in eight button holes around the bottom through the stabilizer for the zipties. That turned out to be a smart decision.

Step 6: Sew the edges of the cone net together with a machine. Then sew the cone net to the bottom of the honey filter by hand. Think about what it must feel like to sew tutus.
Step 7: I threaded a rope through a pool float and then through the holes I’d made in the tupperware top. I used the soldering iron again to melt the kntos in the rope so it wouldn’t detach underwater. I put a Tela Coral sticker on the floats, and then for good engineering measure, glued a washer on the bottom of the float with silicone to keep the stickers facing the right direction. (Not shown)
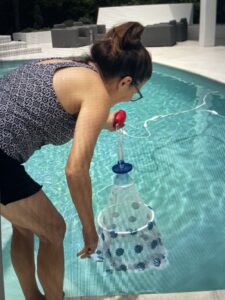
I did a little product testing in a friend’s pool. Things seemed to be working well.
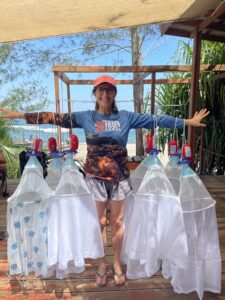
Next stop: Tela.
Read on to find out what we caught!
